Scenario
Recently I was asked by a customer what it means to use shared channels in Microsoft Teams. They had a roadmap session with Microsoft and Shared Channels (also known as B2B Direct Connect) is one of the things that came up. Collaborating in Teams via Shared Channels with multiple parties. The customer’s question is, when this is Global Available, does it work automatically or does something needs to be set up?
But why is this so cool? Well, the biggest benefit (for users and admins) in using B2B Direct Connect, is that you don’t have to invite guest users to your tenant anymore. One of the other benefit for the users is that they do not have to switch in Teams to the other tenant as a guest user.
In this blog I will tell you more about that and how it can be set up.
Default settings
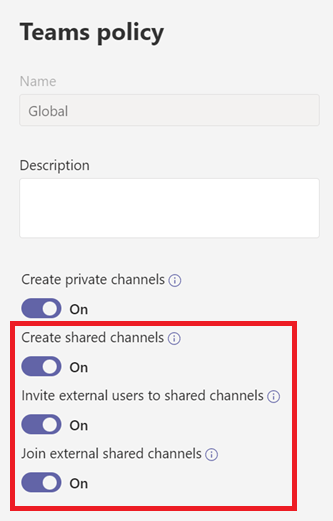
By default, the setting for using Shared Channels is enabled in the Teams Policy in Microsoft Teams Admin Center, but this will not work without setting it up in Azure AD.
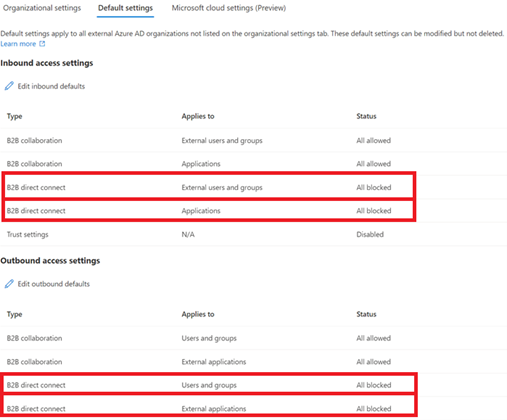
This setting which needs to be set can be found in Azure AD under External Identities > Cross-tenant access settings, you can go to Default settings. Here you will see that the default settings are as followed:
B2B direct connect for users and groups and for applications are inbound en outbound All Blocked by default (see screenshot)
Solution
There are different ways to set up this B2B link. First, you could say that you change the default settings so that the people in your organization can collaborate in Shared Channels with any organization they want. It is important that the other organization has also set this setting in such a way that every user in the organization can participate in shared channels.
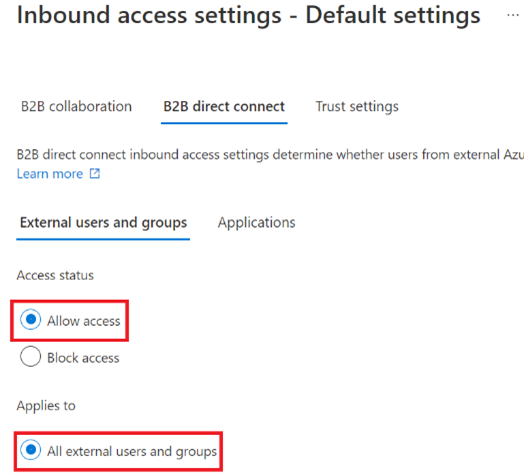
For the inbound settings you will see that these settings will apply to All external users and groups.
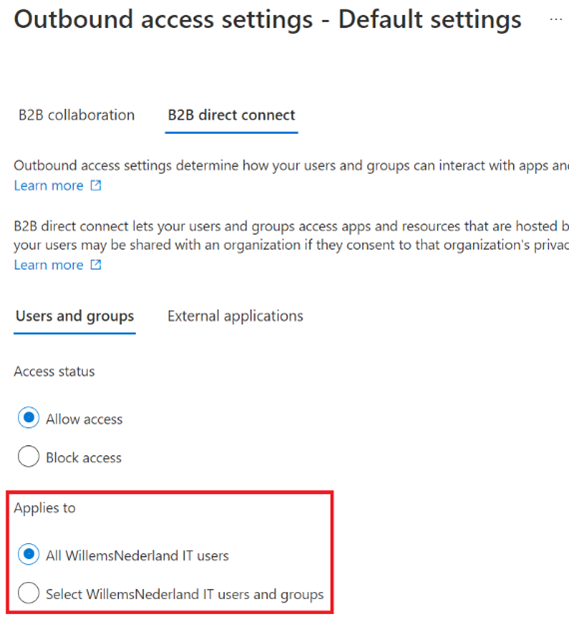
For outbound settings you have some more control, and you can select all users, or select users or groups. If you adjust the default settings, you have less control over the use of shared channels by the users within your company.
The second solution gives more control on who has access. If you like to have more control on this, we have to set this up in a different way. This requires some cooperation from the organization where you want to set up the B2B direct connect with.
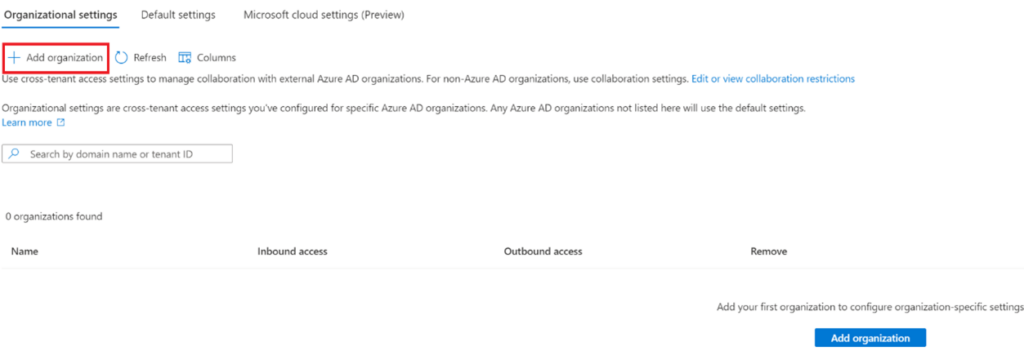
We leave the default settings to all blocked and we will go to Organizational settings under Cross-tenant access settings. Here we can add an organization that we want to collaborate with through the b2b direct connect link.
In the next paragraph I will show you how to set up this link.
Configuration steps
First, we will add an organization under the heading organizational settings by clicking the plus sign Add organization.

You can add and find the organization in two different ways. On Domain name (custom or onmicrosoft.com), or using the tenant ID. It does not matter if you use domain name or Tenant ID, it will automatically provide you the Name and Tenant ID of the external company (good for an additional check).
After you added the organization, you will see this on the screen:

You will see that inbound and outbound access settings are inherited from default. We do not want to use the default settings, so we are going to change that.
First, we start with the inbound access settings (click on Inherited from default to go to the settings). Then click on B2B direct connect.
The default settings are Block access and All users and groups and applications.
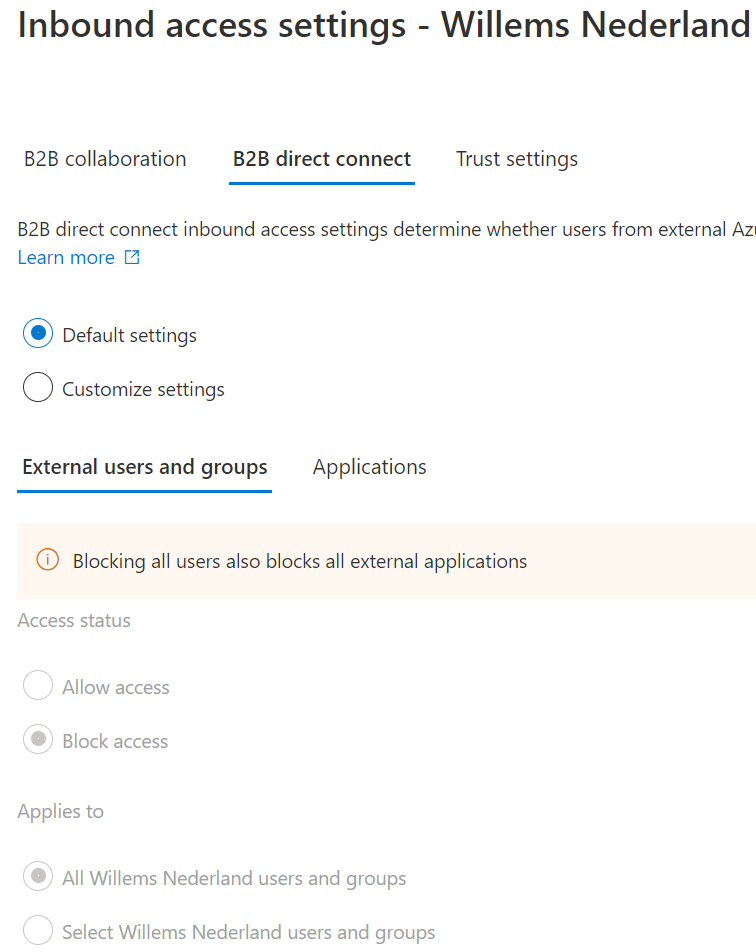
This is not wat we want; we want to customize the settings.
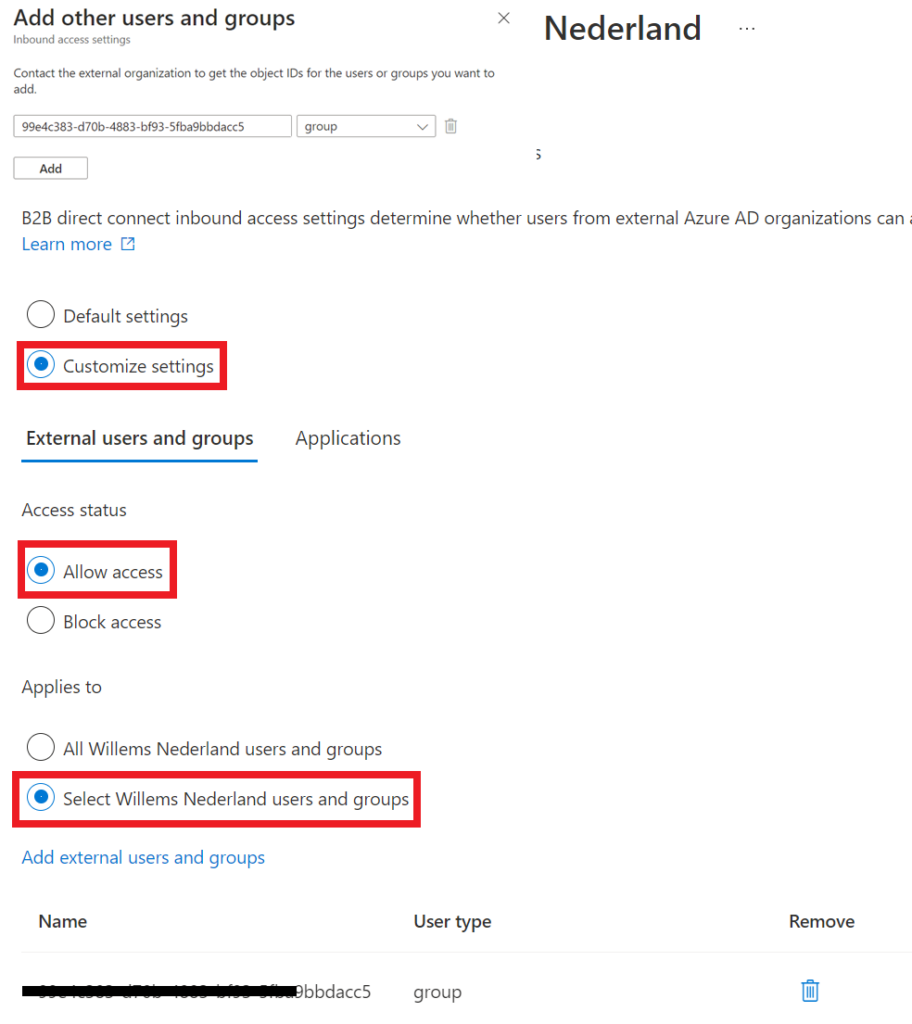
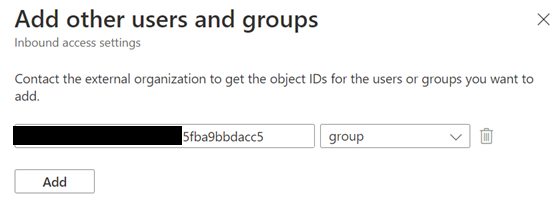
In this case we want to have a little more control on who has access, so we asked the other organization to create a group with users who can use B2B direct connect. We have asked for the group object and added that to the applied group. So only users from the external organization, who are in that particular group can use B2B direct connect with our organization.
Now that is done. Now you want to select the application for which you want to allow access.
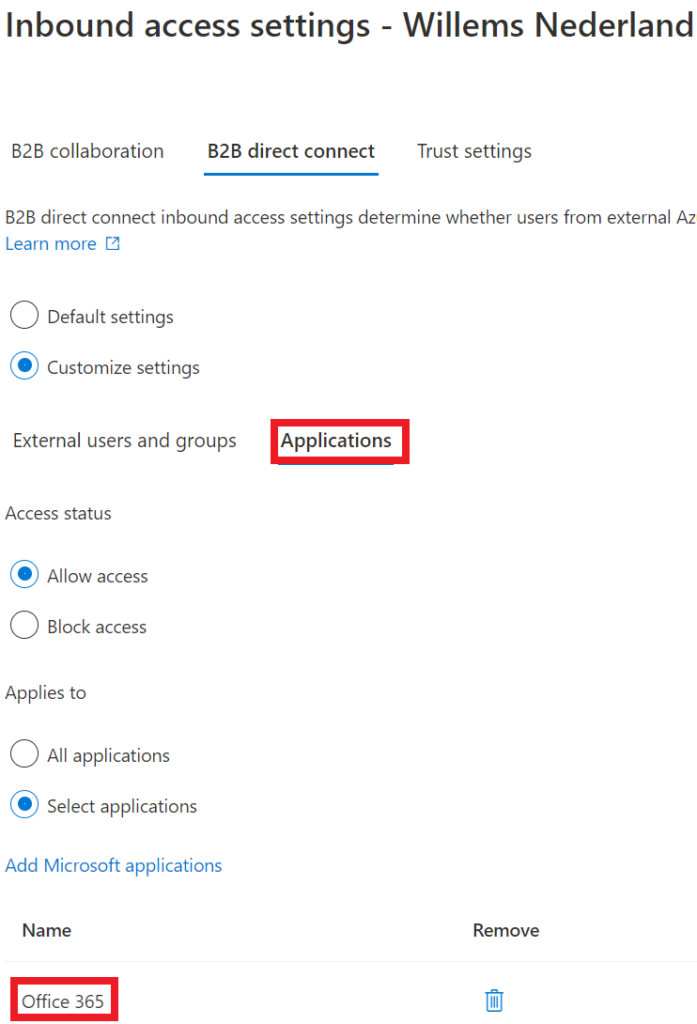
We select Office 365, so that if in the future there are some more applications added, they do not automatically have access.
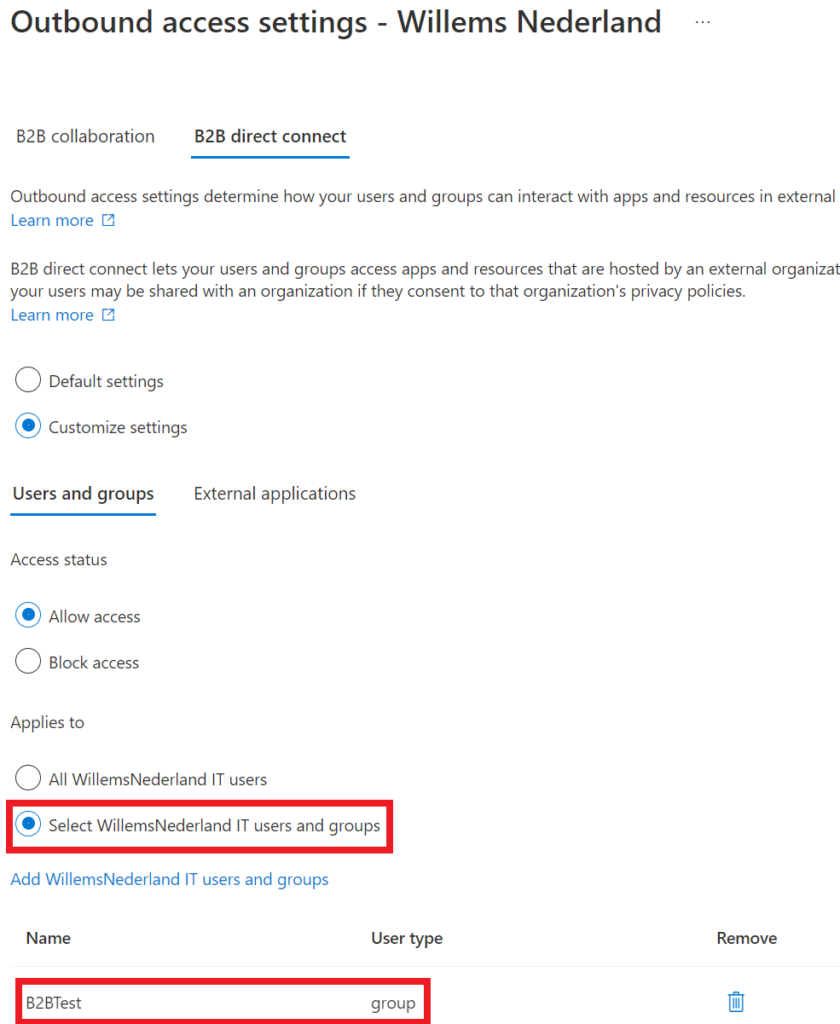
After we have configured our inbound access, we need to setup the outbound access. In outbound the default settings are also block access and all users. We will change this as well because we want to have a little control.
We are going to select allow access and add a group to the selected users. We can control who are in the group, so only users in that particular group are allowed to use B2B direct connect (we write down the object id for the external organization, because they need to add this group as well in their inbound settings).
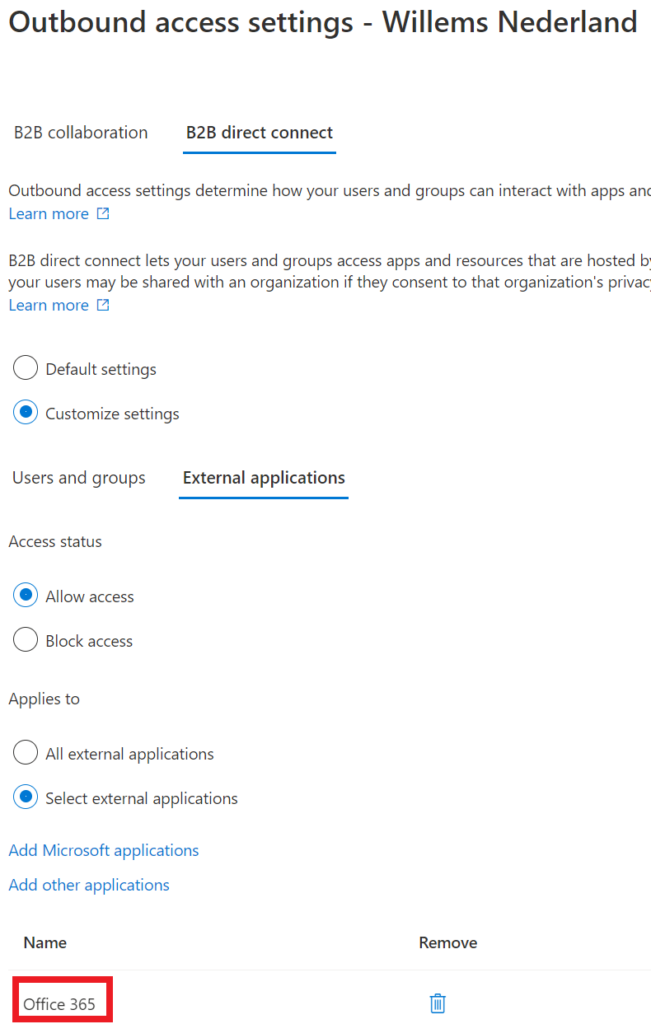
For the external applications, we select Office 365 as well, so we keep a hold on that.
So now you are done and the users in your organization can use B2B direct connect (the users in the group of course).
But now you want to know, how this will work in Teams right? In the next blog I will show you how this works in Teams. Thanks for reading my blog and if you have any questions, let me know.